
The official buying journey
How to buy through Kakobuy: eight steps from product to receipt
Before the parcel can move, the order needs the right listing, specification and payment. Follow the official sequence, then use the journey pages for the warehouse and delivery checks.
Official tutorial sequence checked on 15 October 2026. Original images show older UI: prices, coupons, routes and account values are illustrative. Current Kakobuy forms, checkout and terms govern. Open any image at full size.
Select products
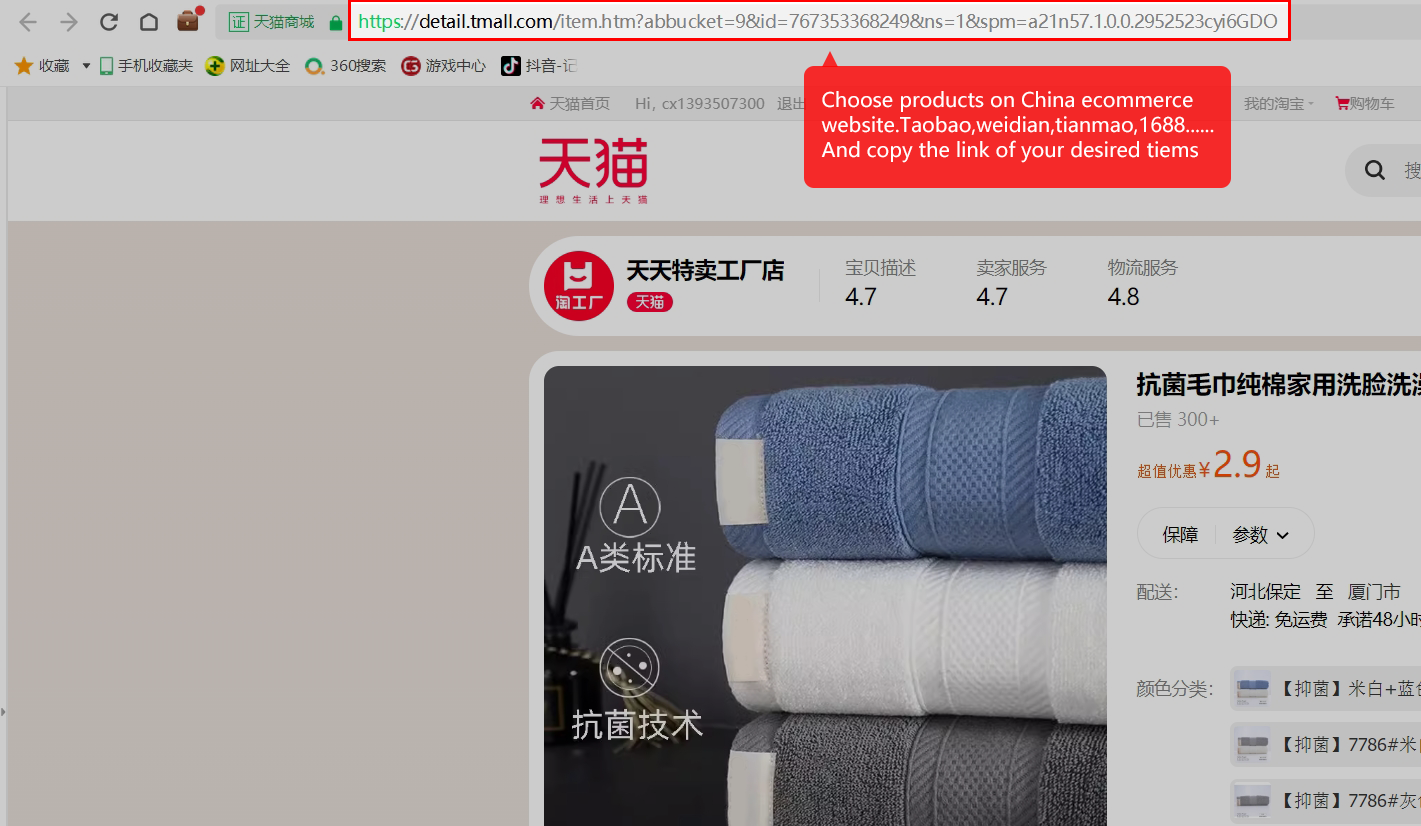
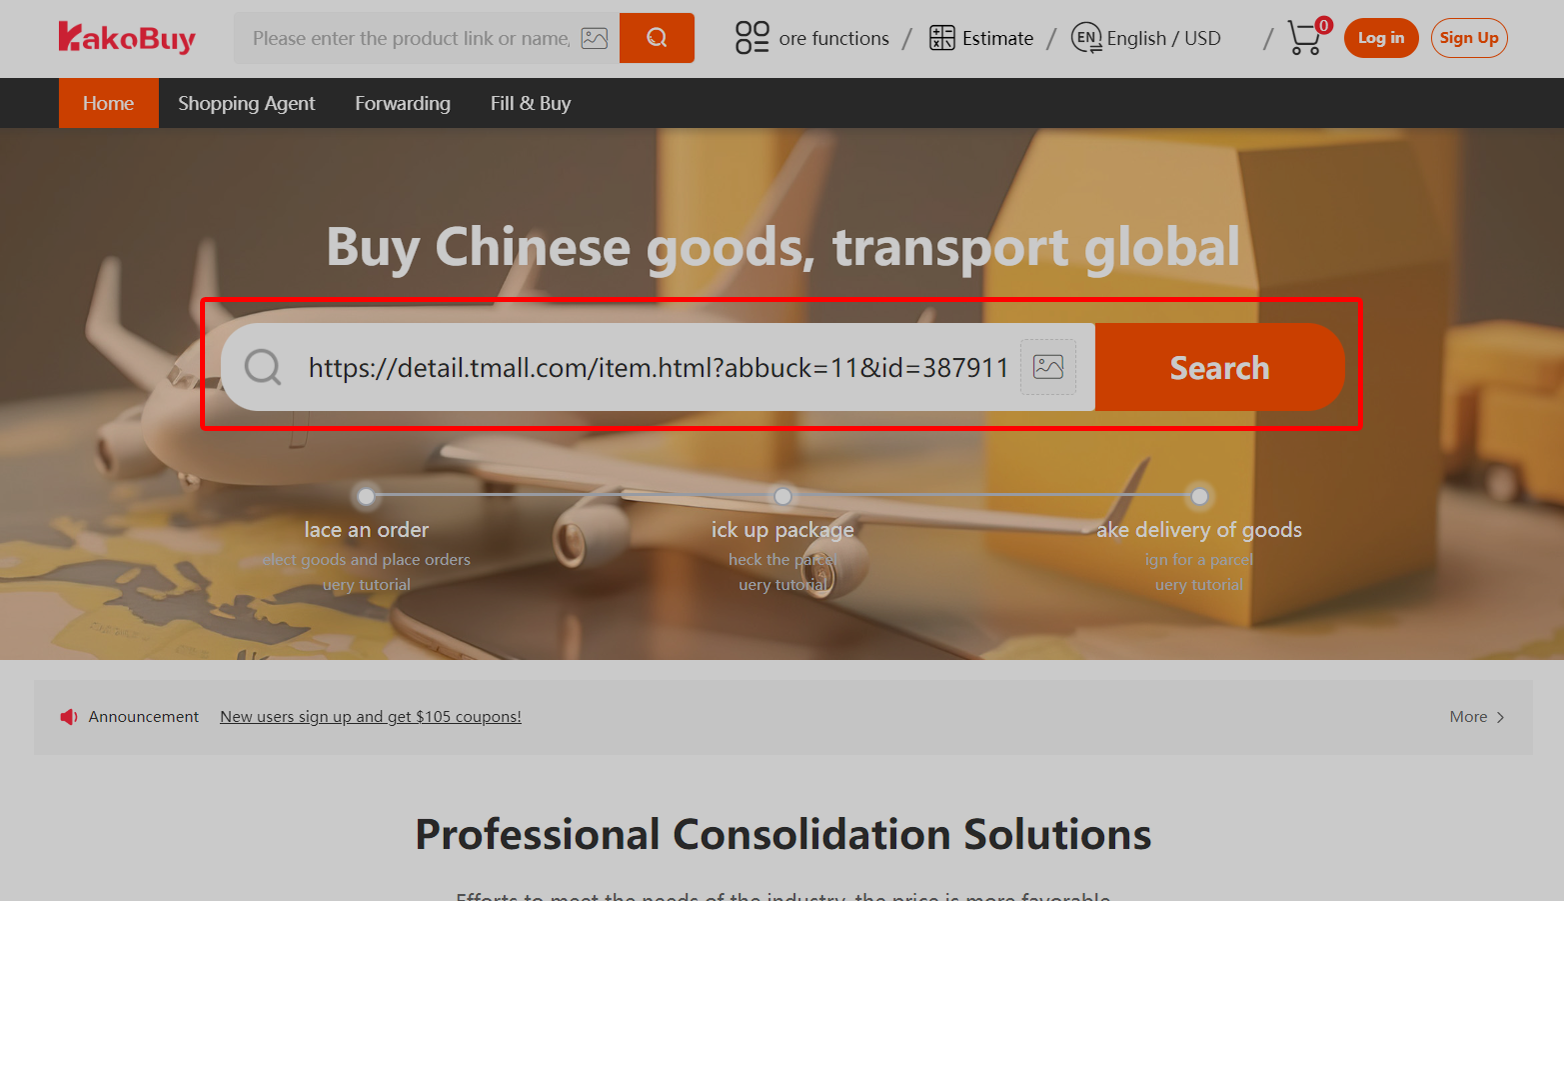
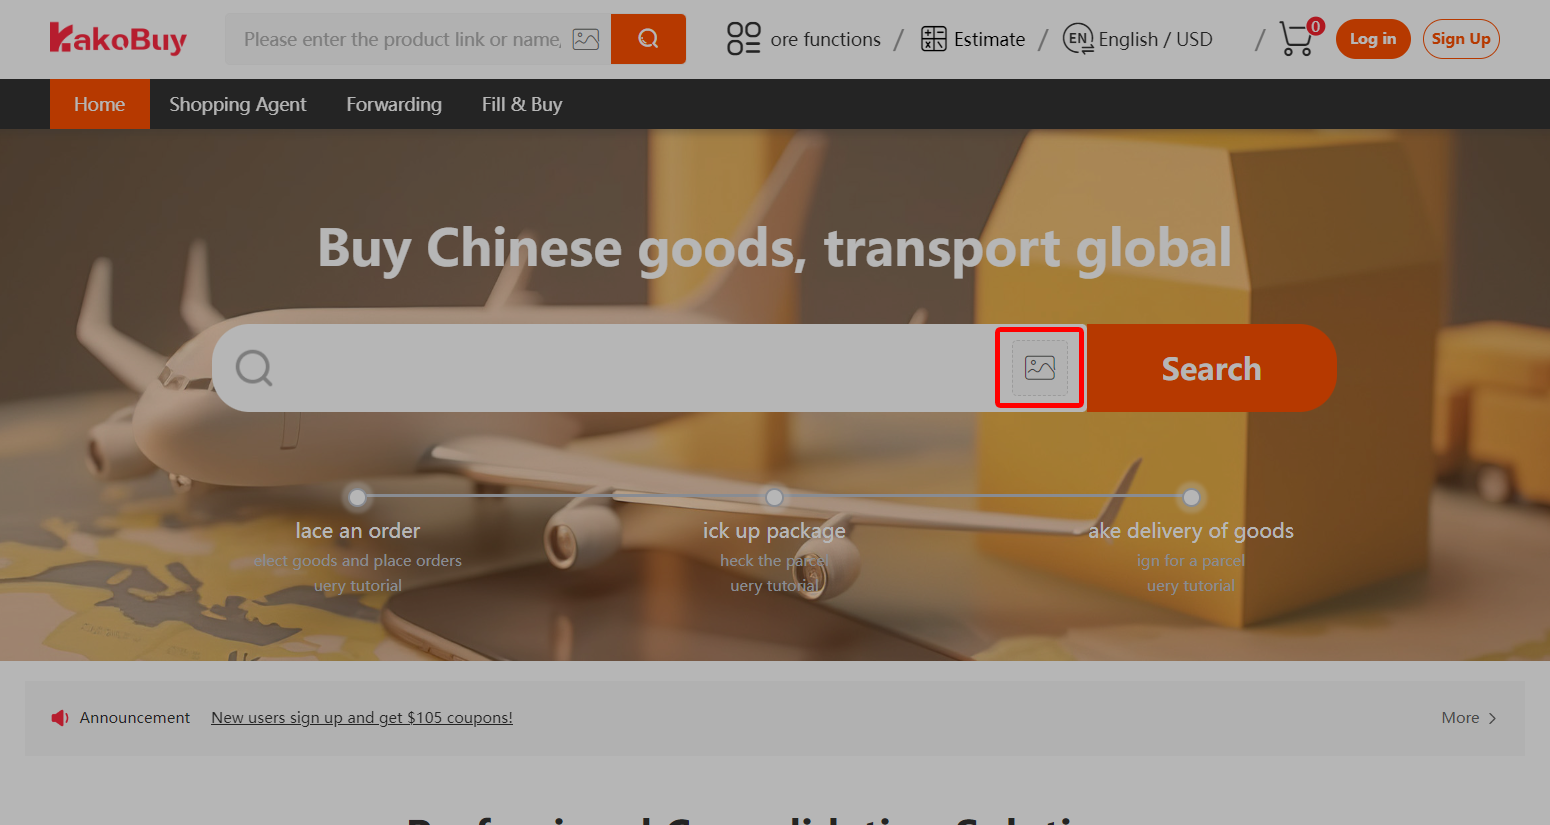
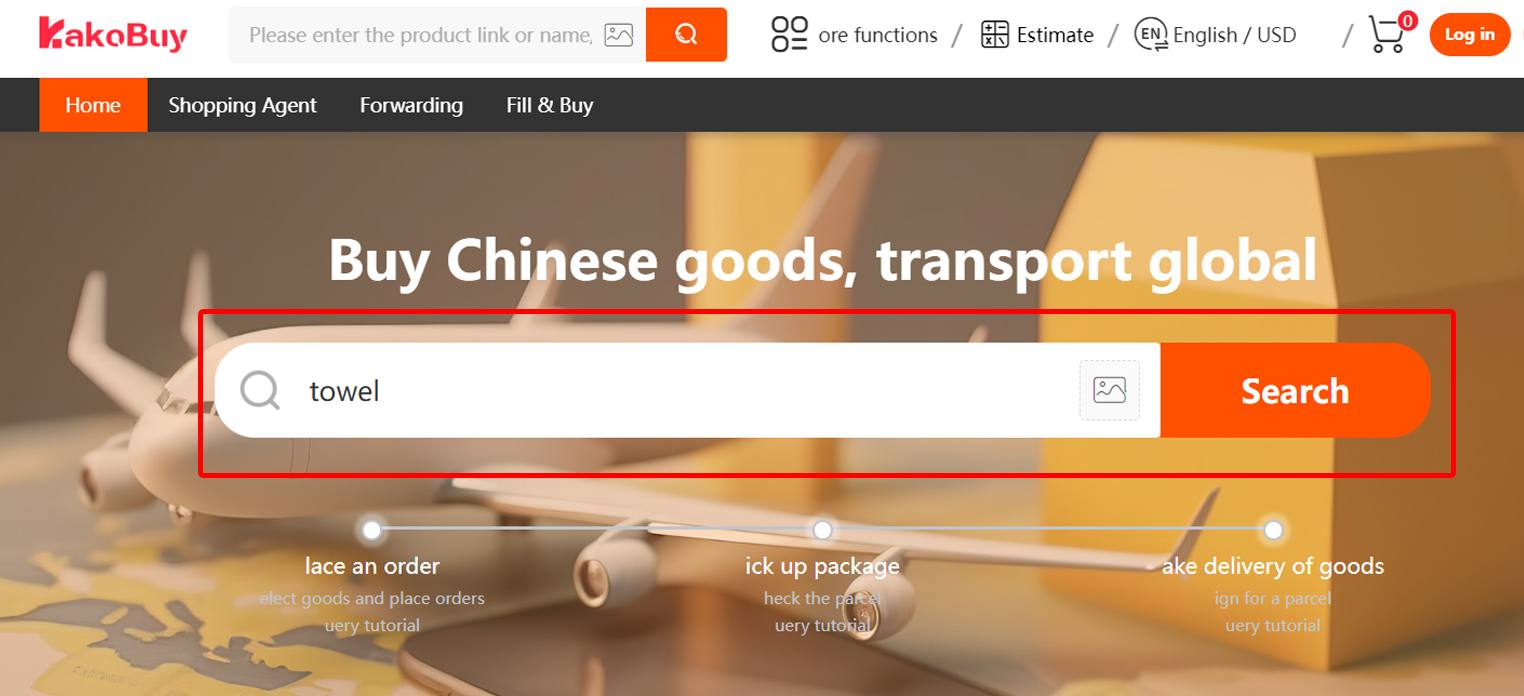
Start with a product you have checked on a category shelf or marketplace. The official tutorial offers three discovery methods: copy and paste a product link, search by image, or enter a keyword.
Before moving on, open the actual seller listing and identify its colour, size and quantity options. An image search match can point to a different seller or variant. The tutorial names Taobao, Tmall, 1688 and JD for automatic product search; an unsupported or unreadable listing may require the manual branch in step 2.
Keep the exact listing URL and specification. Check the seller and item before payment.
Submit the purchasing order
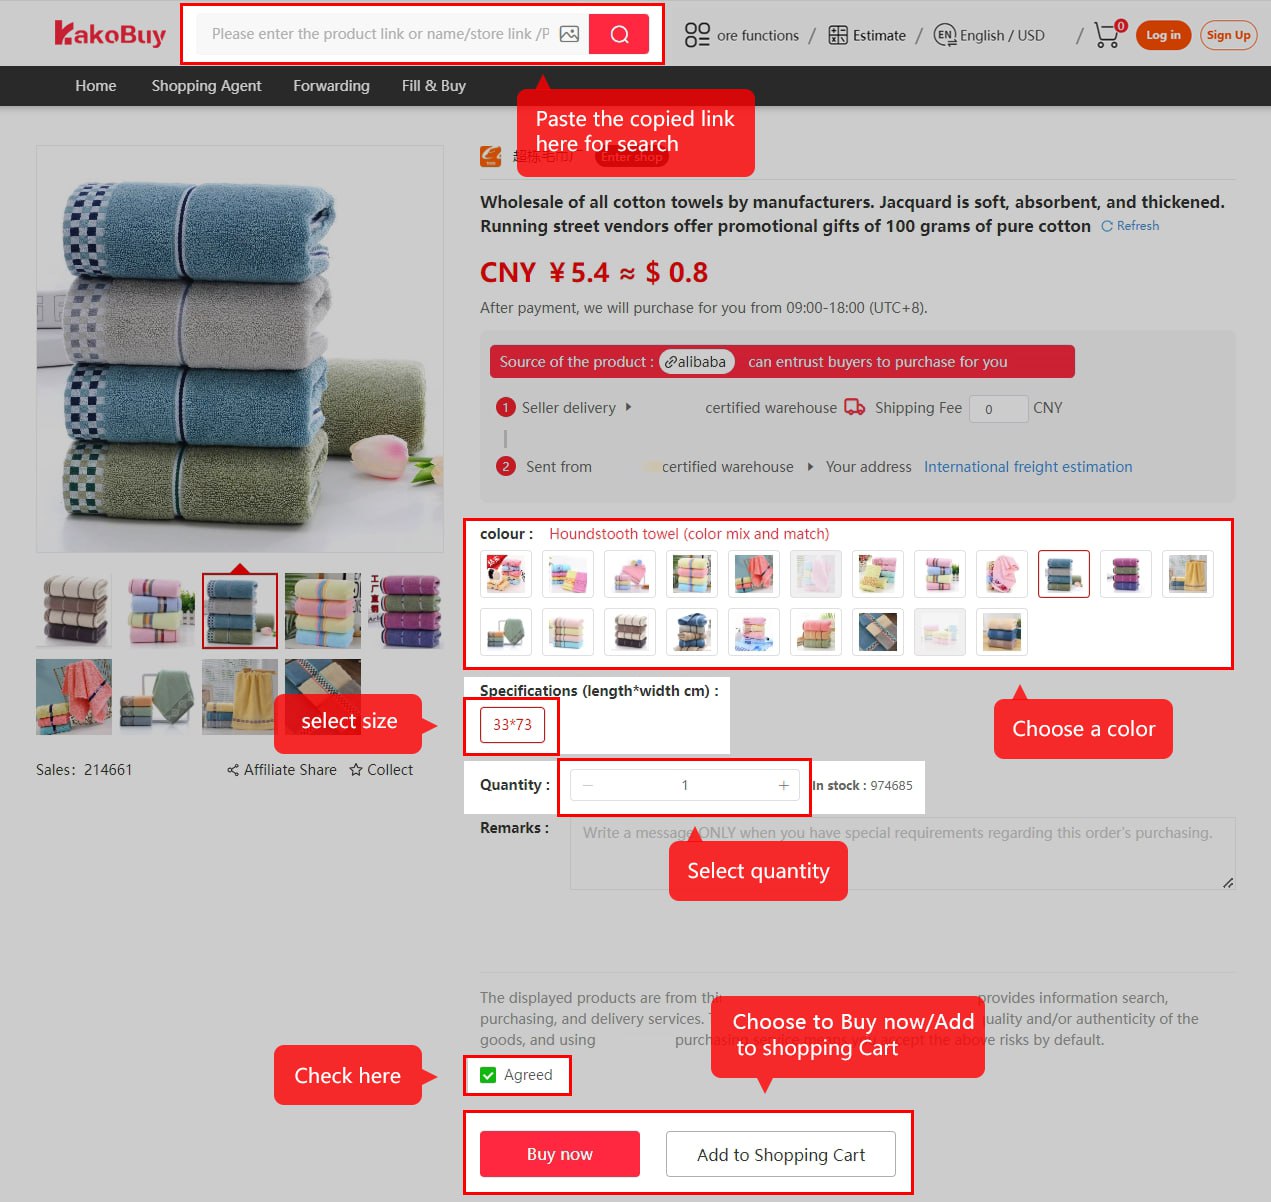
On the imported product page, choose colour, size and quantity. Use remarks for a clear purchasing requirement, such as the exact specification to confirm. Review the agreement and add the item to your cart or choose Buy now.
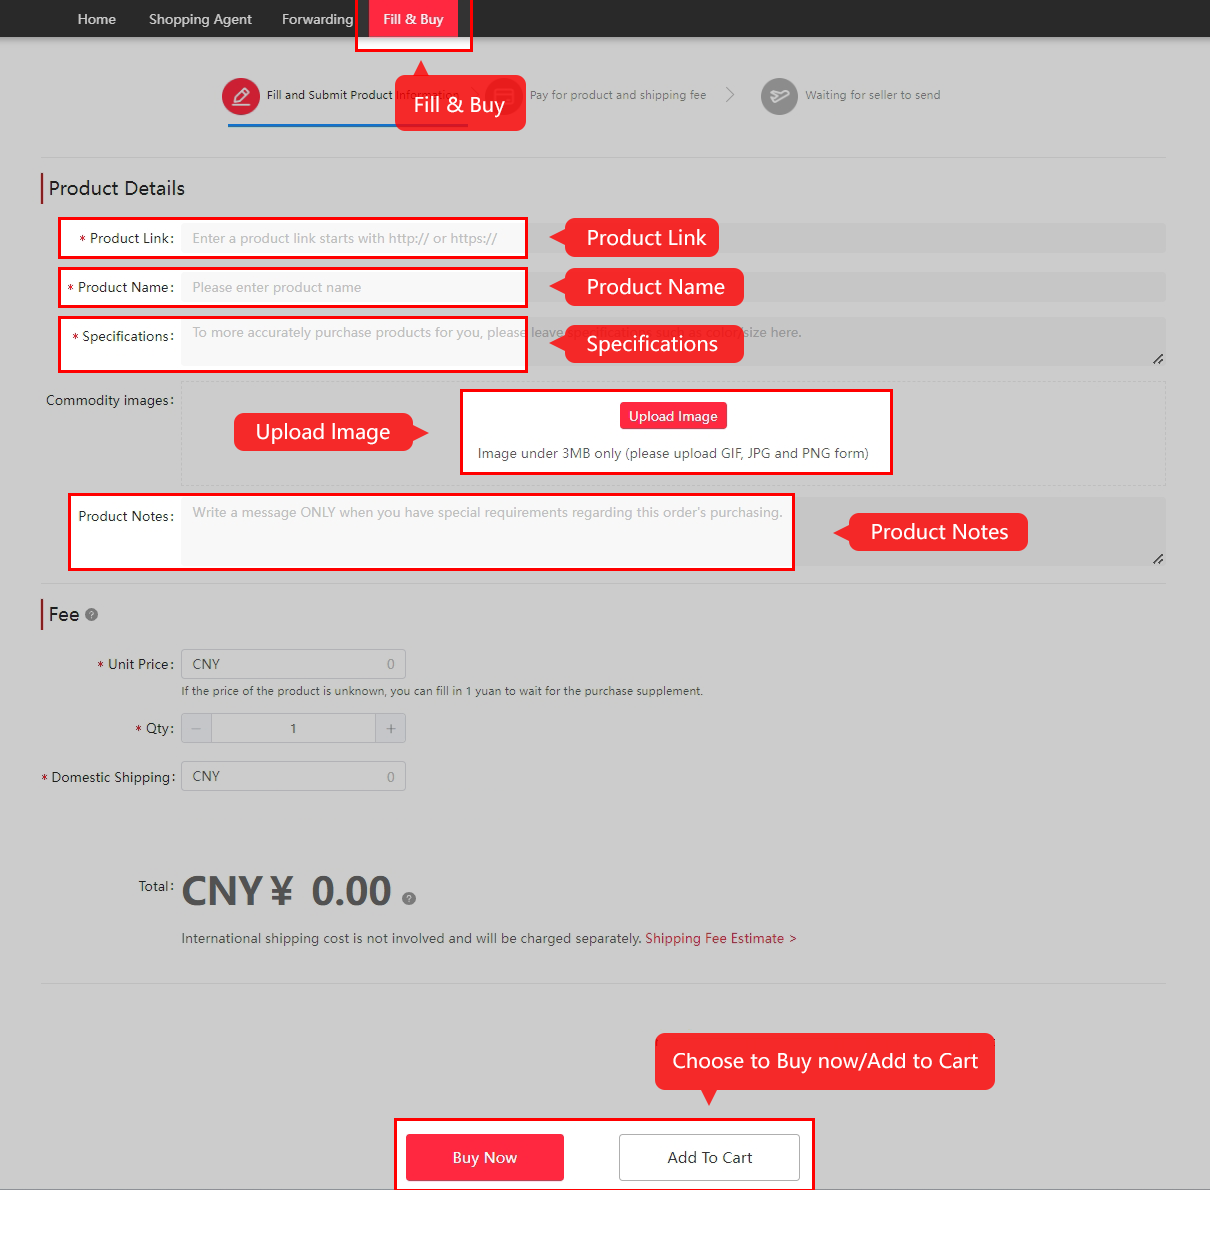
If you use Fill & Buy, enter the product link, product name, specification, quantity and seller-to-warehouse delivery charge. Read the manual-order conditions before payment; a manually entered description does not establish stock or after-sales cover.
A manual order may have narrower after-sales conditions. Read the actual agreement, then save your submitted details.
Pay for the goods and domestic delivery
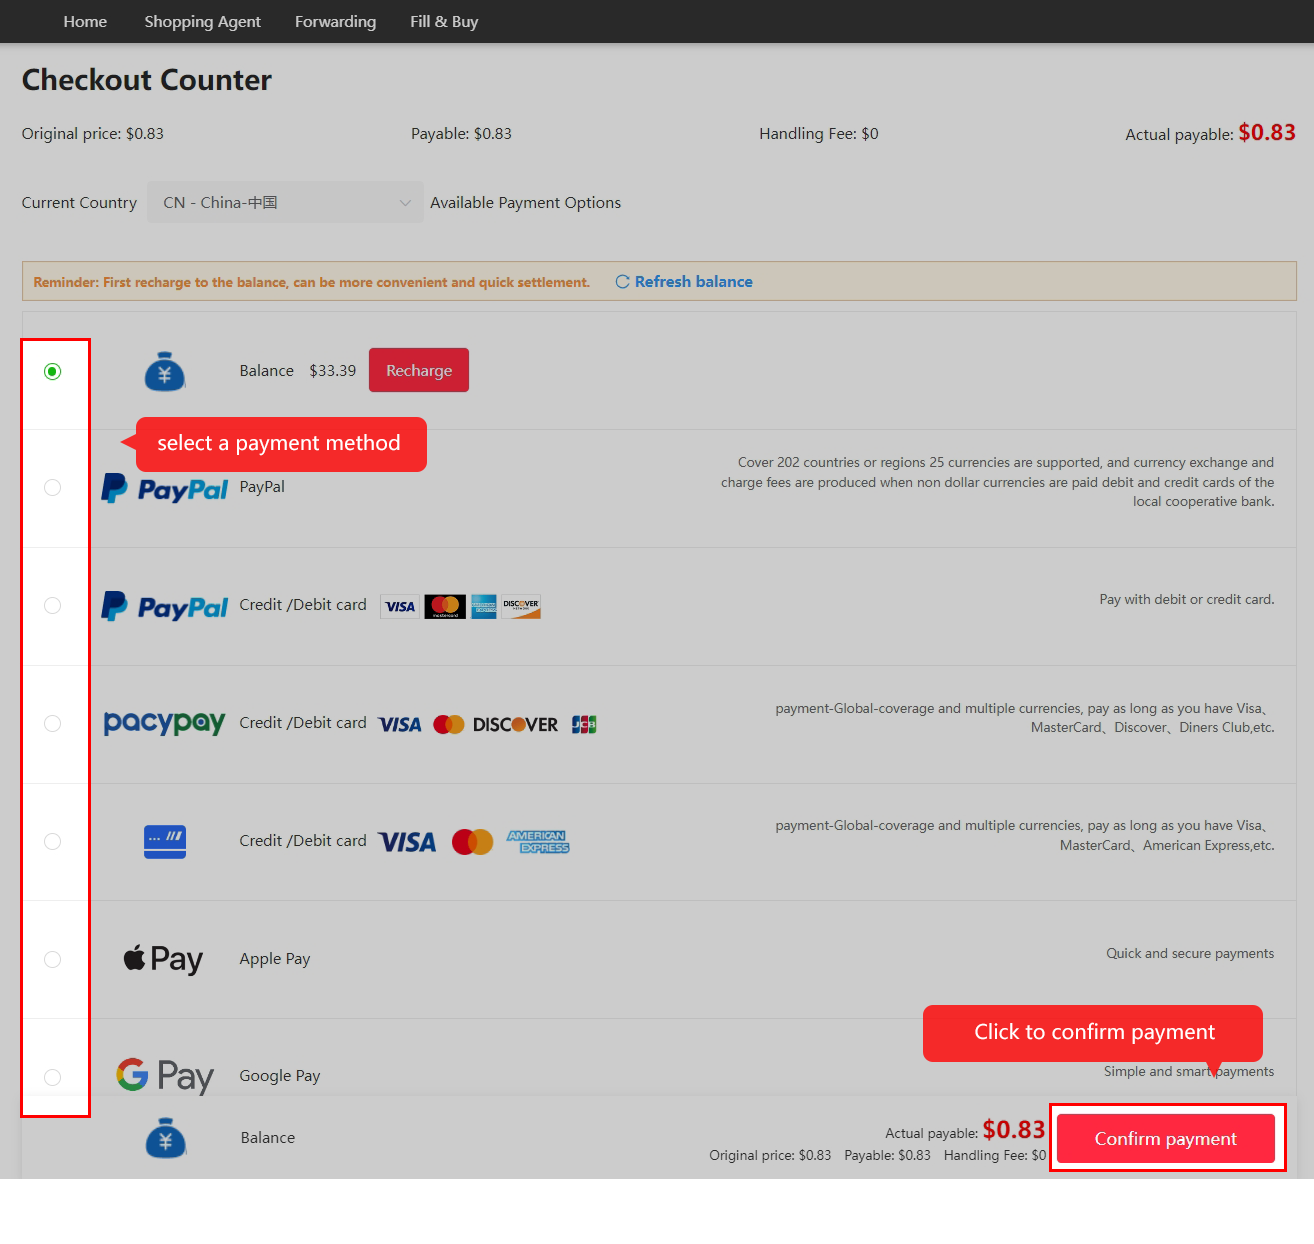
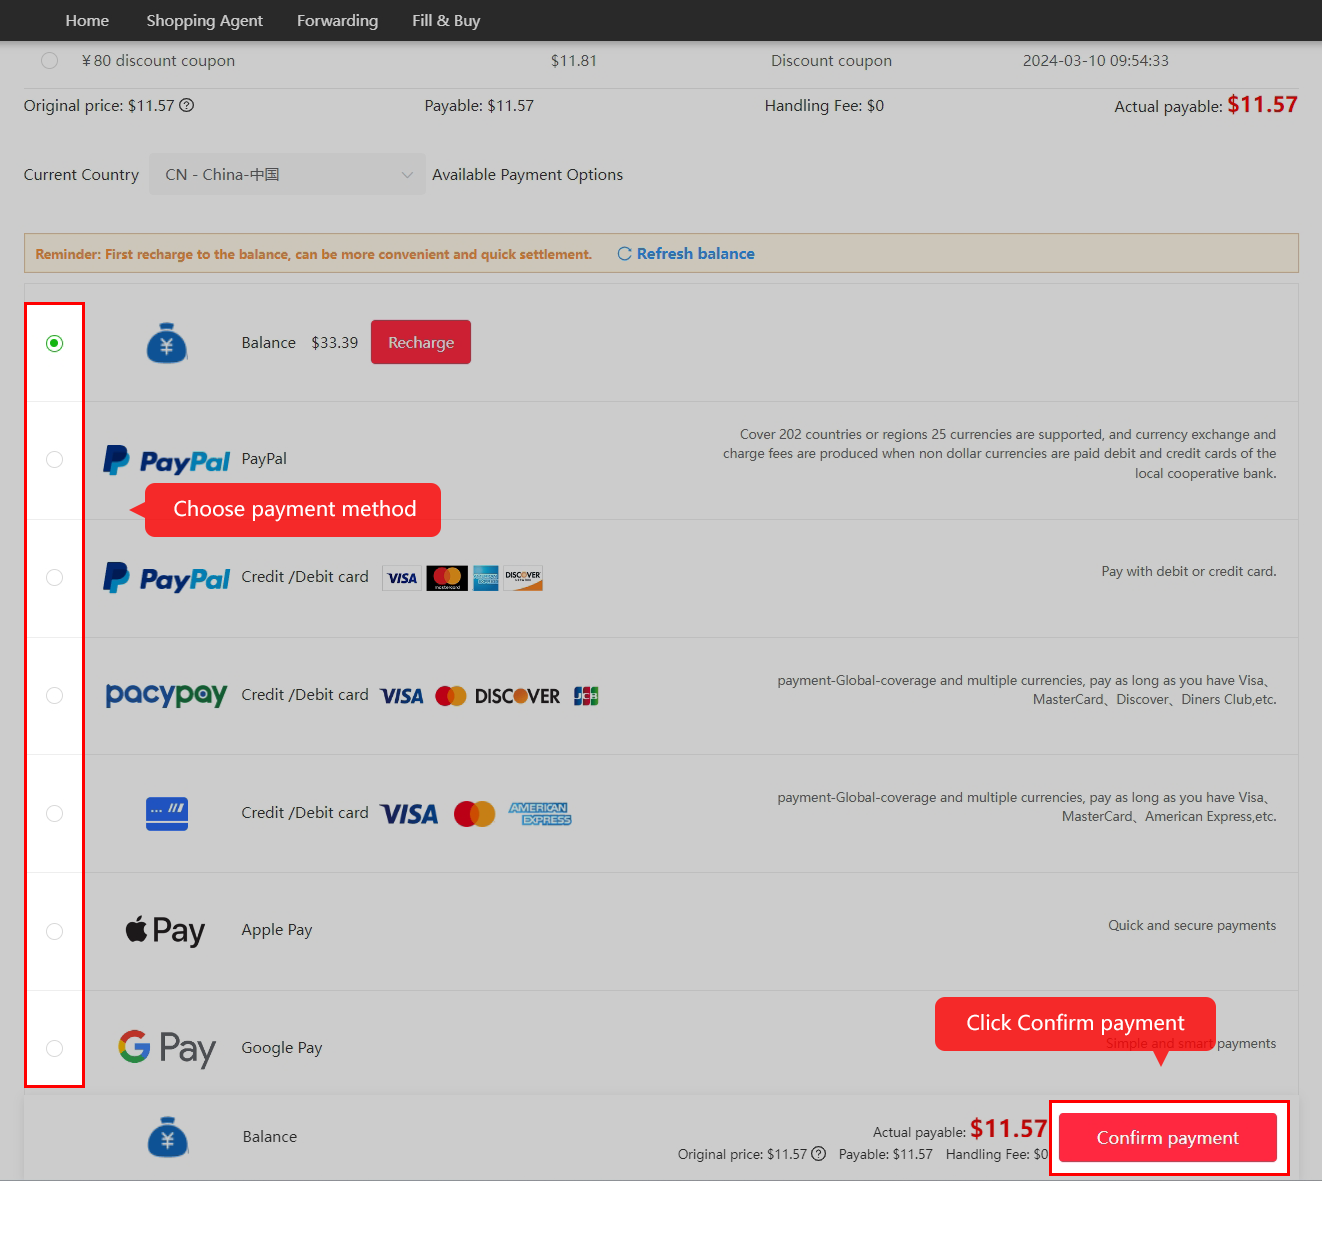
This payment funds the items and their delivery from the seller to Kakobuy's warehouse. International shipping is a separate payment at step 6.
Check the actual payable amount, chosen payment method, conversion and any fee before confirming. The operator's help pages contain different PayPal examples, so use the live payment screen rather than a rate copied from this older screenshot.
The first payment covers the goods and domestic delivery. Plan funding and conversion costs as well.
Wait for purchasing and delivery to the warehouse
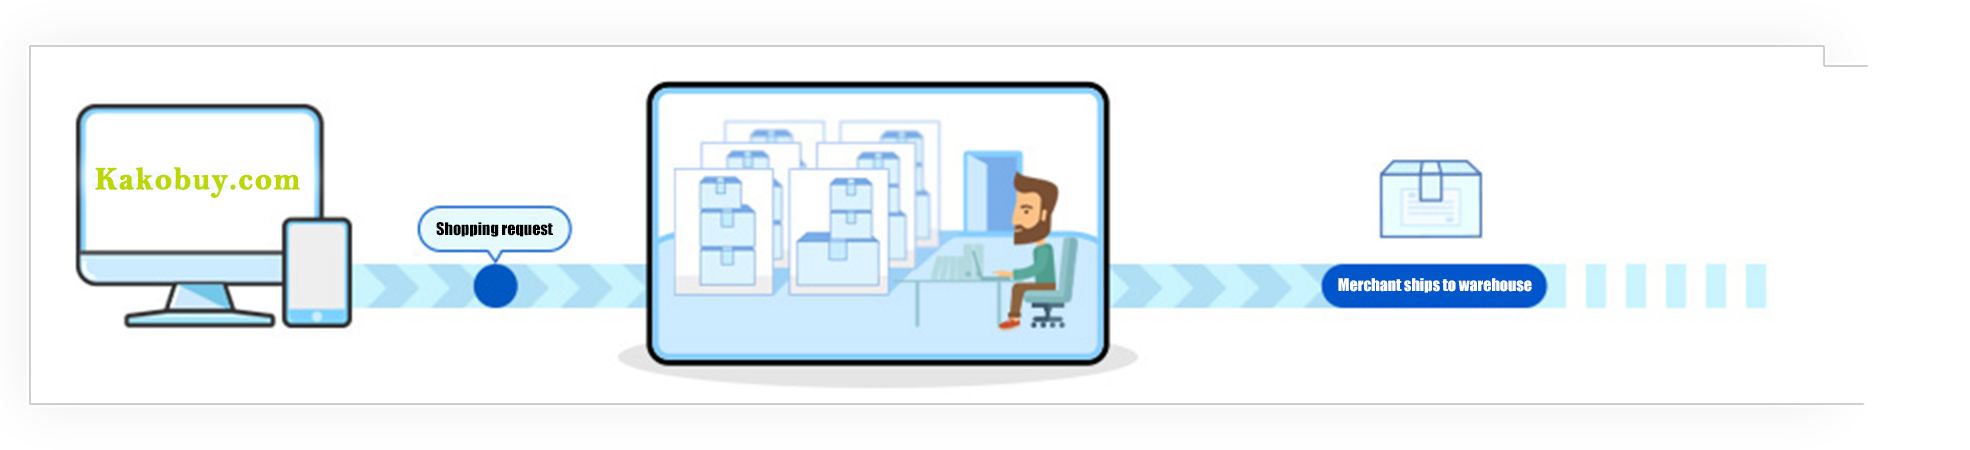
Kakobuy reviews the purchasing request and places the marketplace order. The seller then sends the item domestically to the warehouse. Payment, purchasing and seller dispatch are different statuses.
The official tutorial describes order review in 3–5 working hours and a domestic delivery cycle of 3–5 days. These are the operator's published indications, checked in the tutorial on 15 October 2026, not a deadline for your order. Seller stock, working hours and delivery conditions can change the wait.
At this stage, seller dispatch and arrival are separate events. Use the warehouse record once the order arrives.
Review quality inspection and storage
After warehouse arrival, open the stored item and its QC Picture thumbnails. Compare what is visible with the order you submitted: colour, size label, quantity, condition and any requested detail.
Visual QC does not establish authenticity, electronic function or every hidden defect. Sealed items and some categories have narrower inspection coverage. Request the particular photo or measurement that resolves your concern before you submit the parcel.
Check the arrival promptly: storage does not extend a return window. Review the photos and clock.
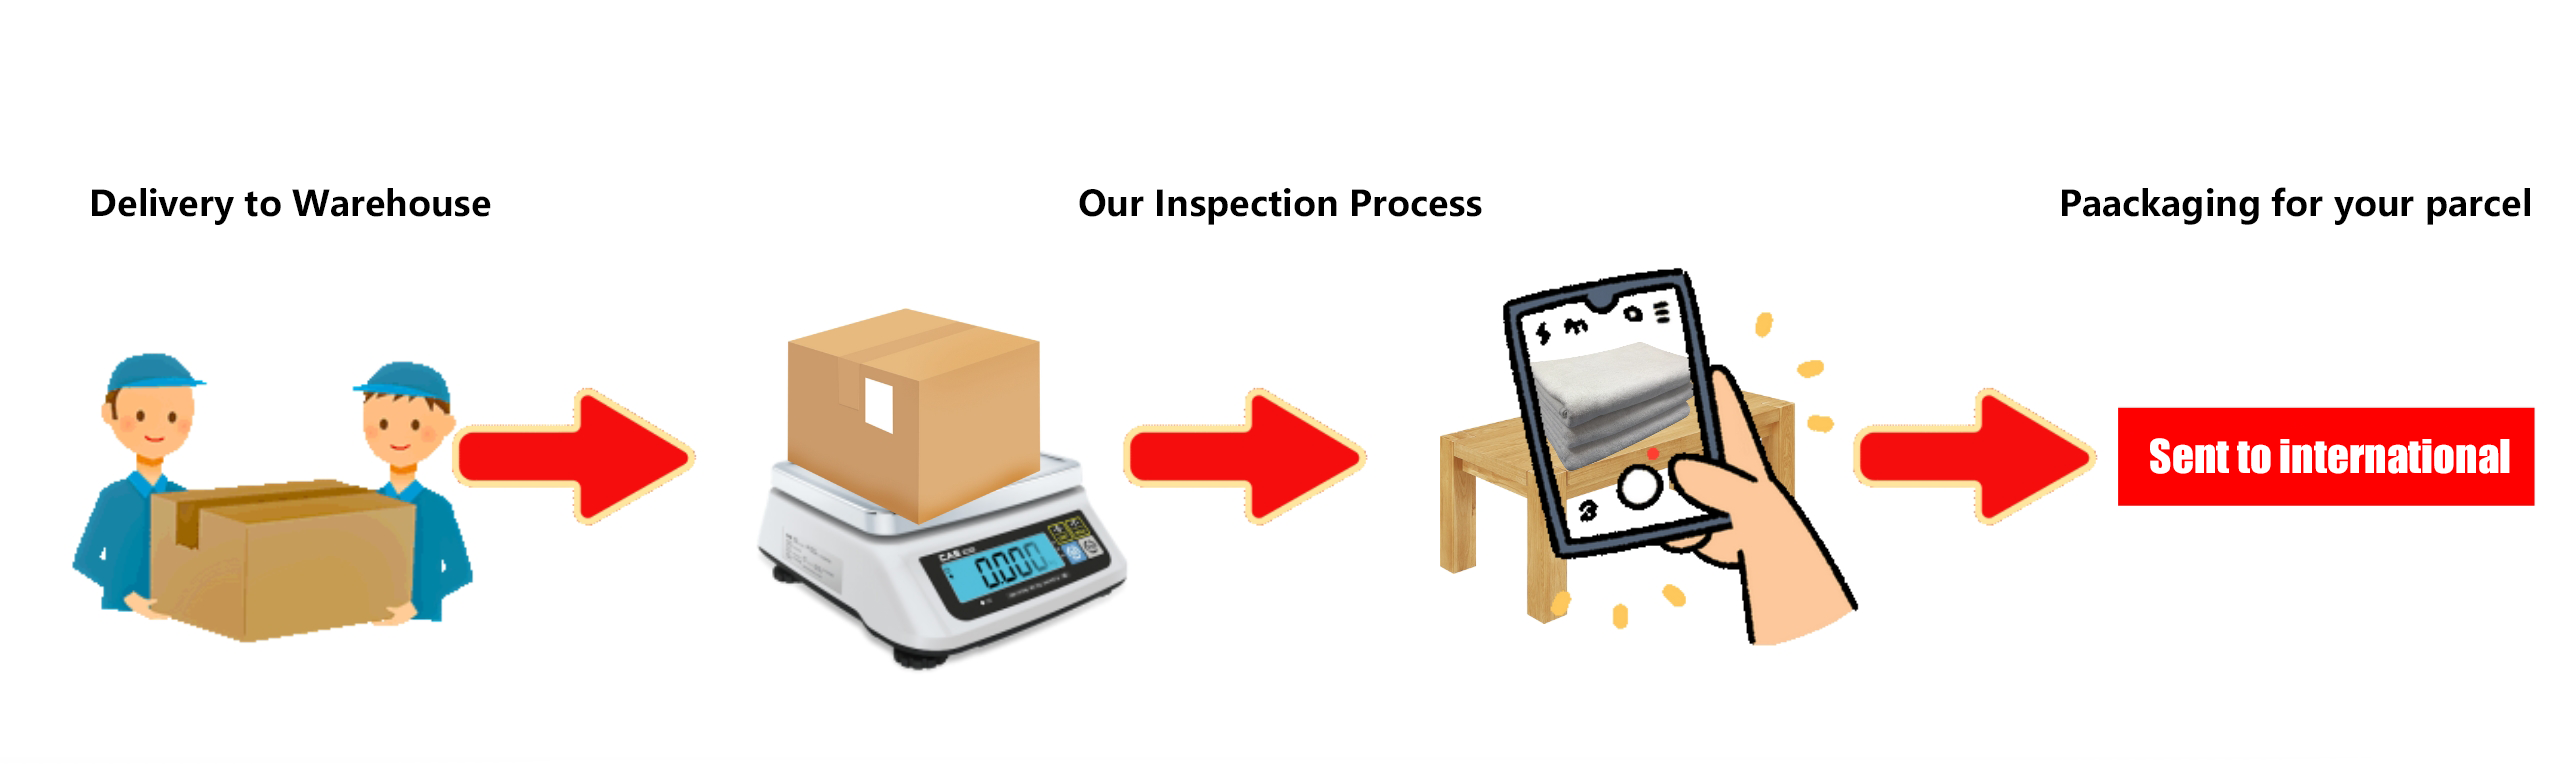
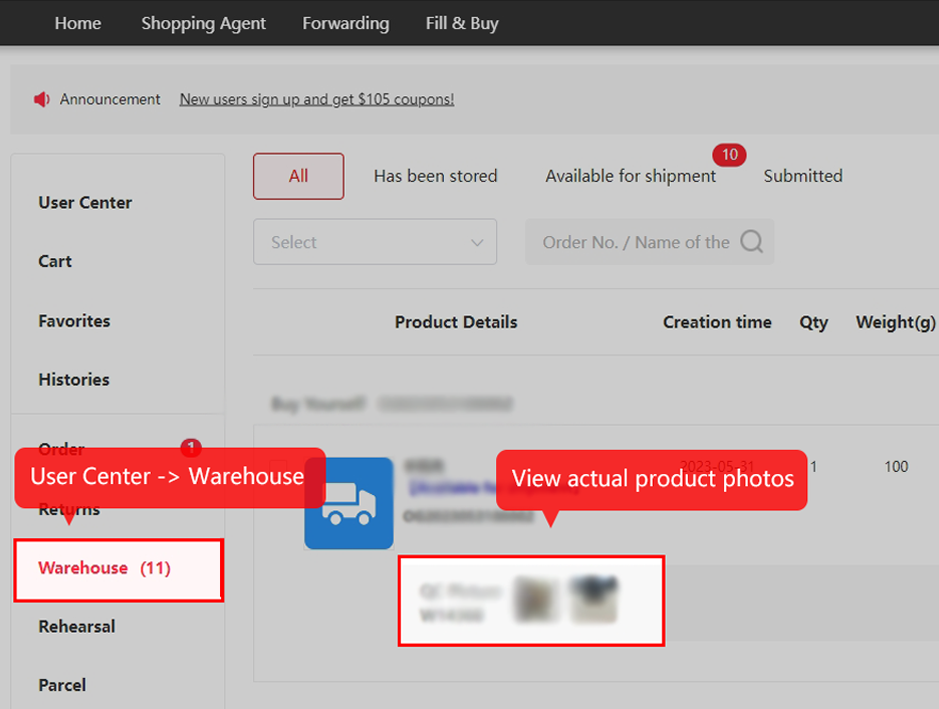
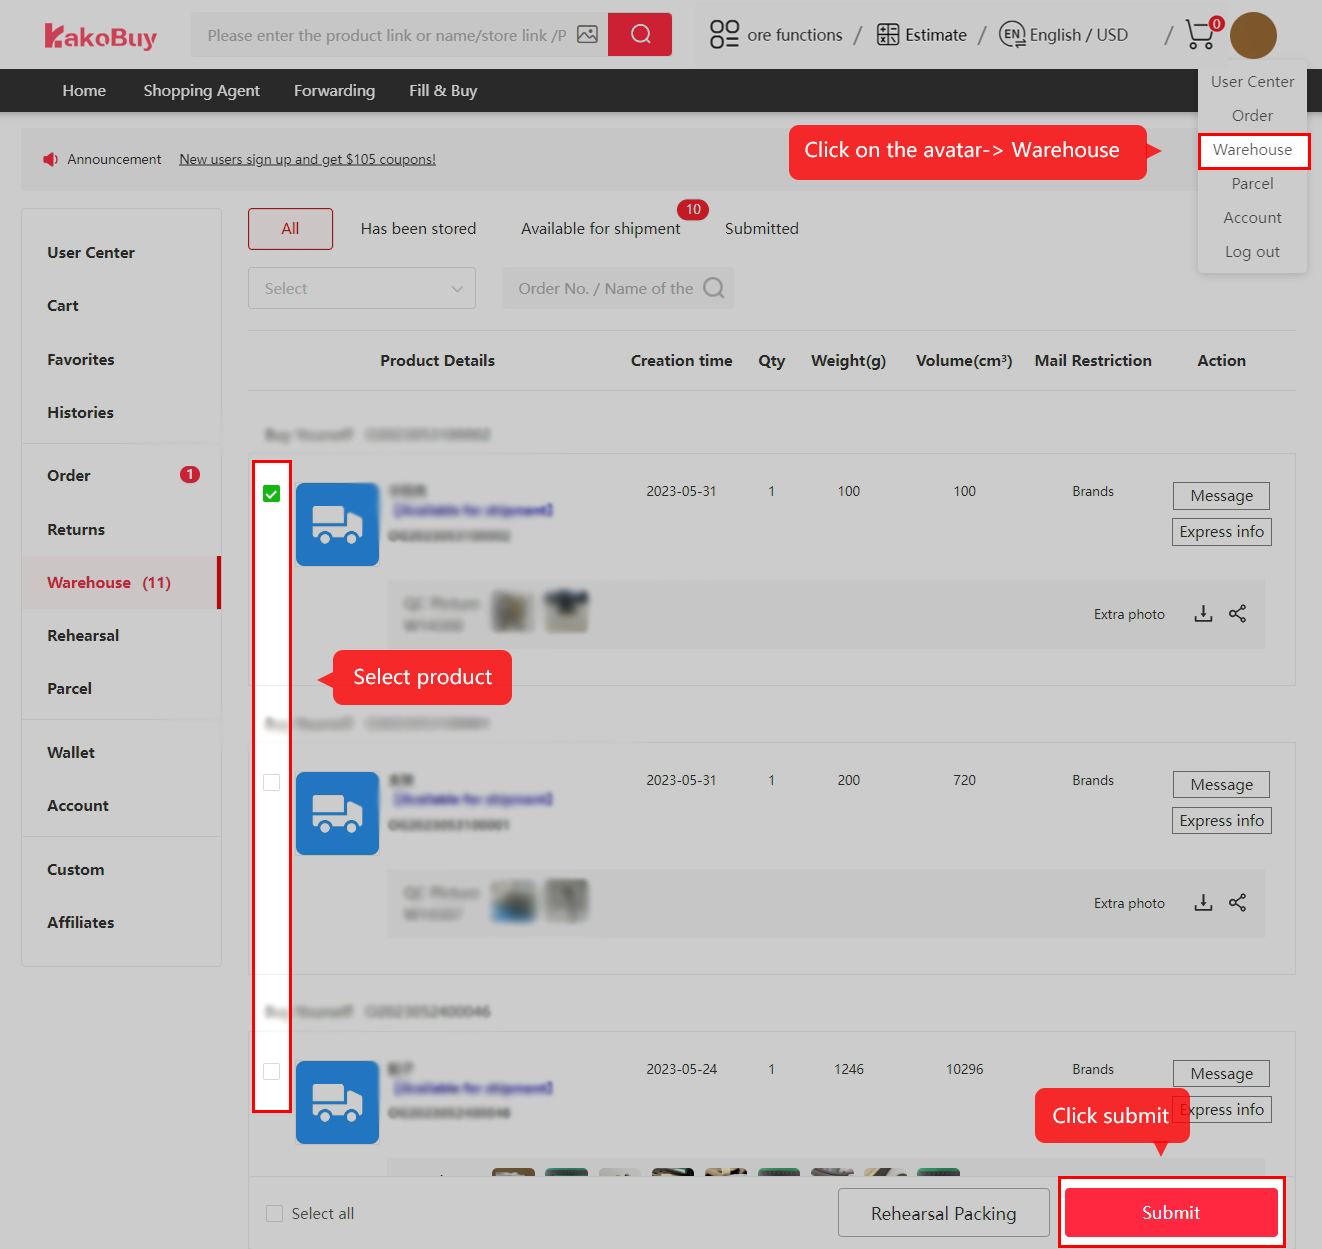
Submit your overseas shipment and pay its fees
Select the stored items for this parcel, check the recipient address and choose packing options. Keep packaging that protects fragile contents; do not remove every box or tag without a reason.
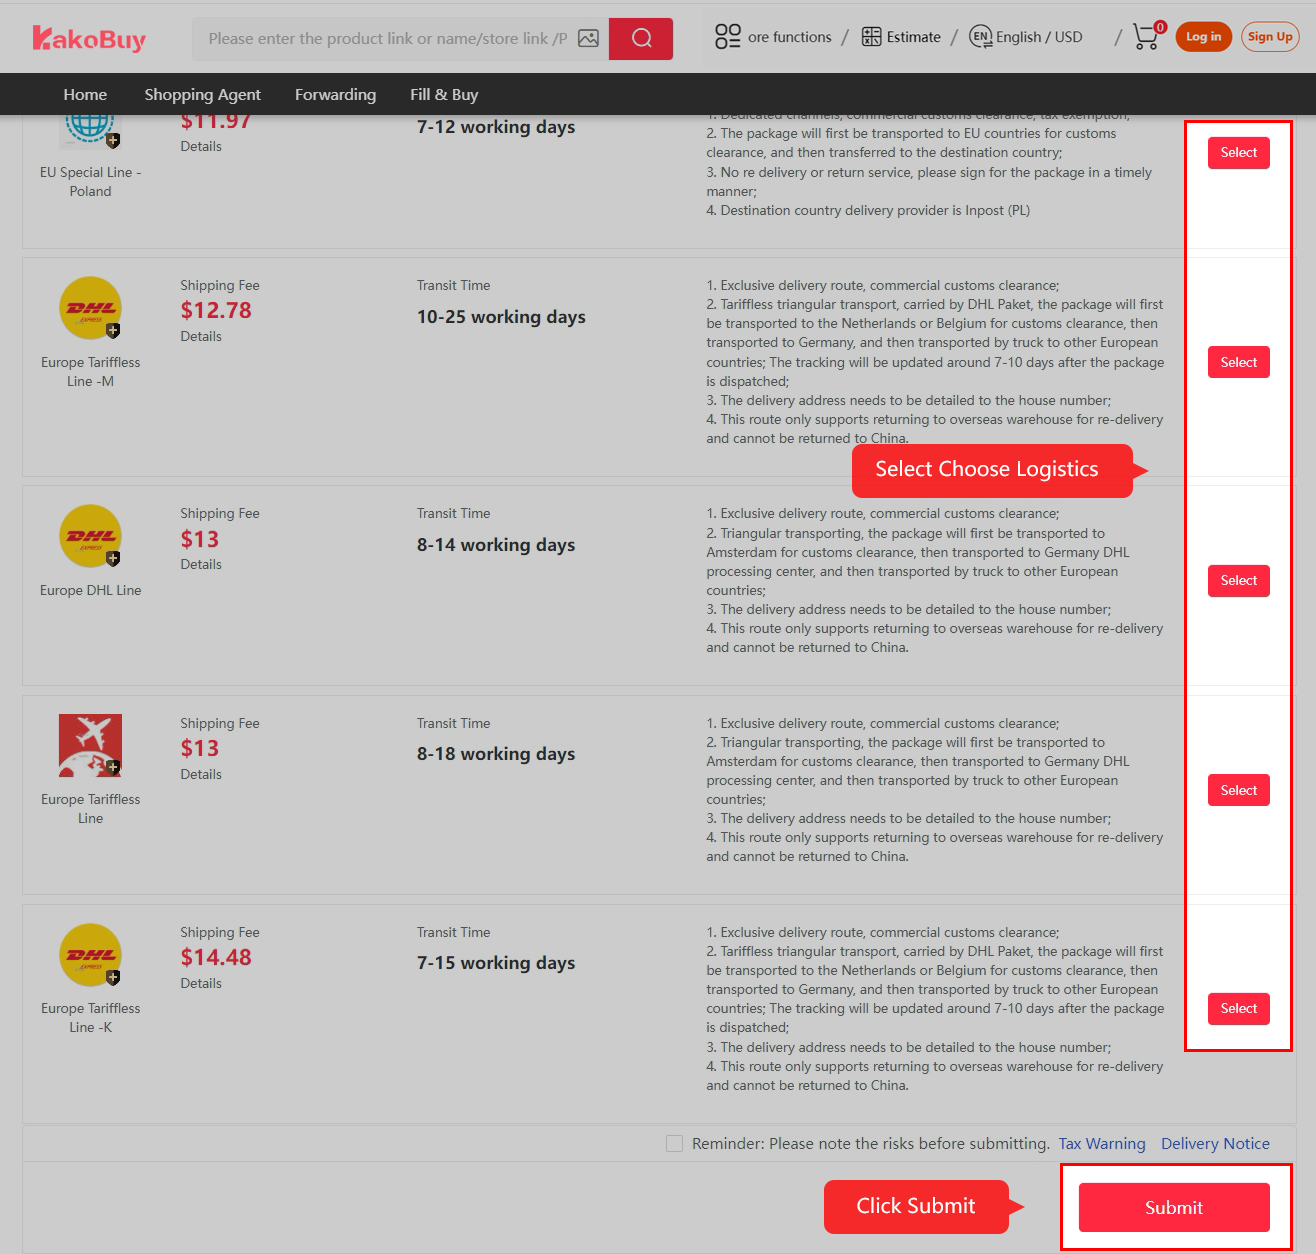
Compare eligible logistics for your destination and goods type, read the restrictions and insurance terms, then review the parcel checkout and pay international shipping. Apply only a coupon that the live checkout accepts for this parcel.
Warehouse item measurements help planning. Packed dimensions, packaging weight and the chosen route's billing formula determine the final chargeable weight. Older routes, coupon values and prices pictured below do not establish today's availability.
The parcel now needs packed measurements and an eligible route. Compare weight rules before treating an estimate as a bill.
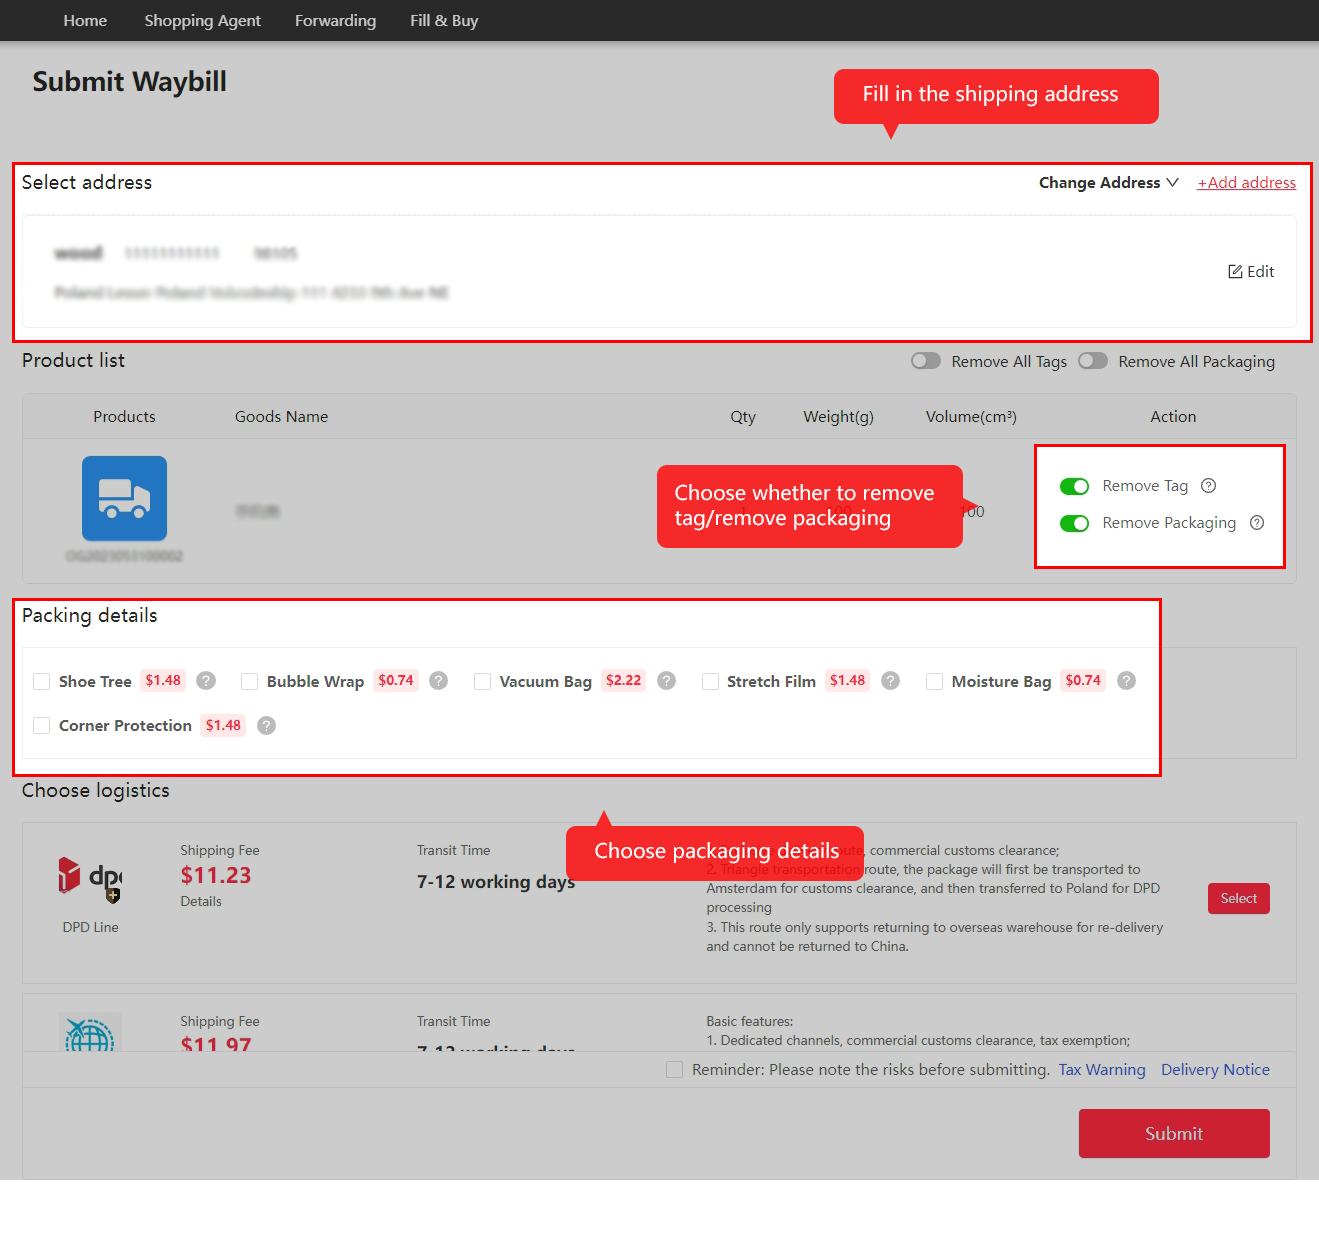
Follow packing, dispatch and transport
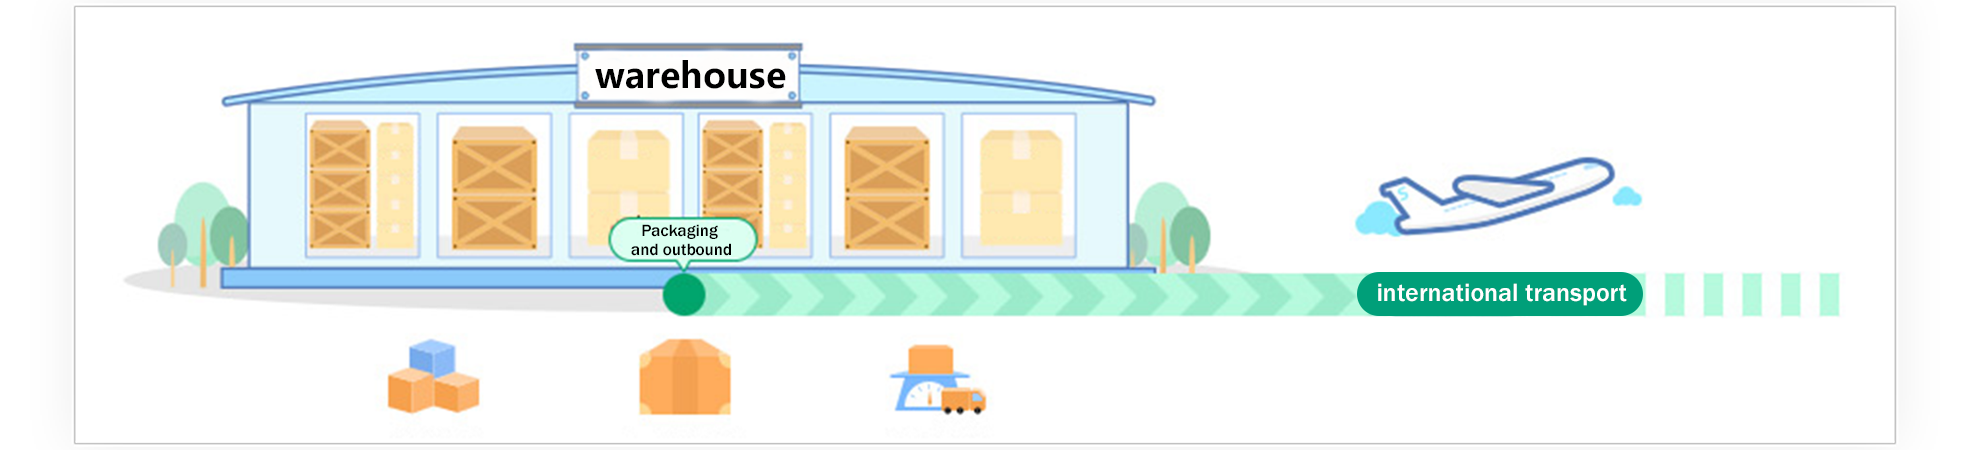
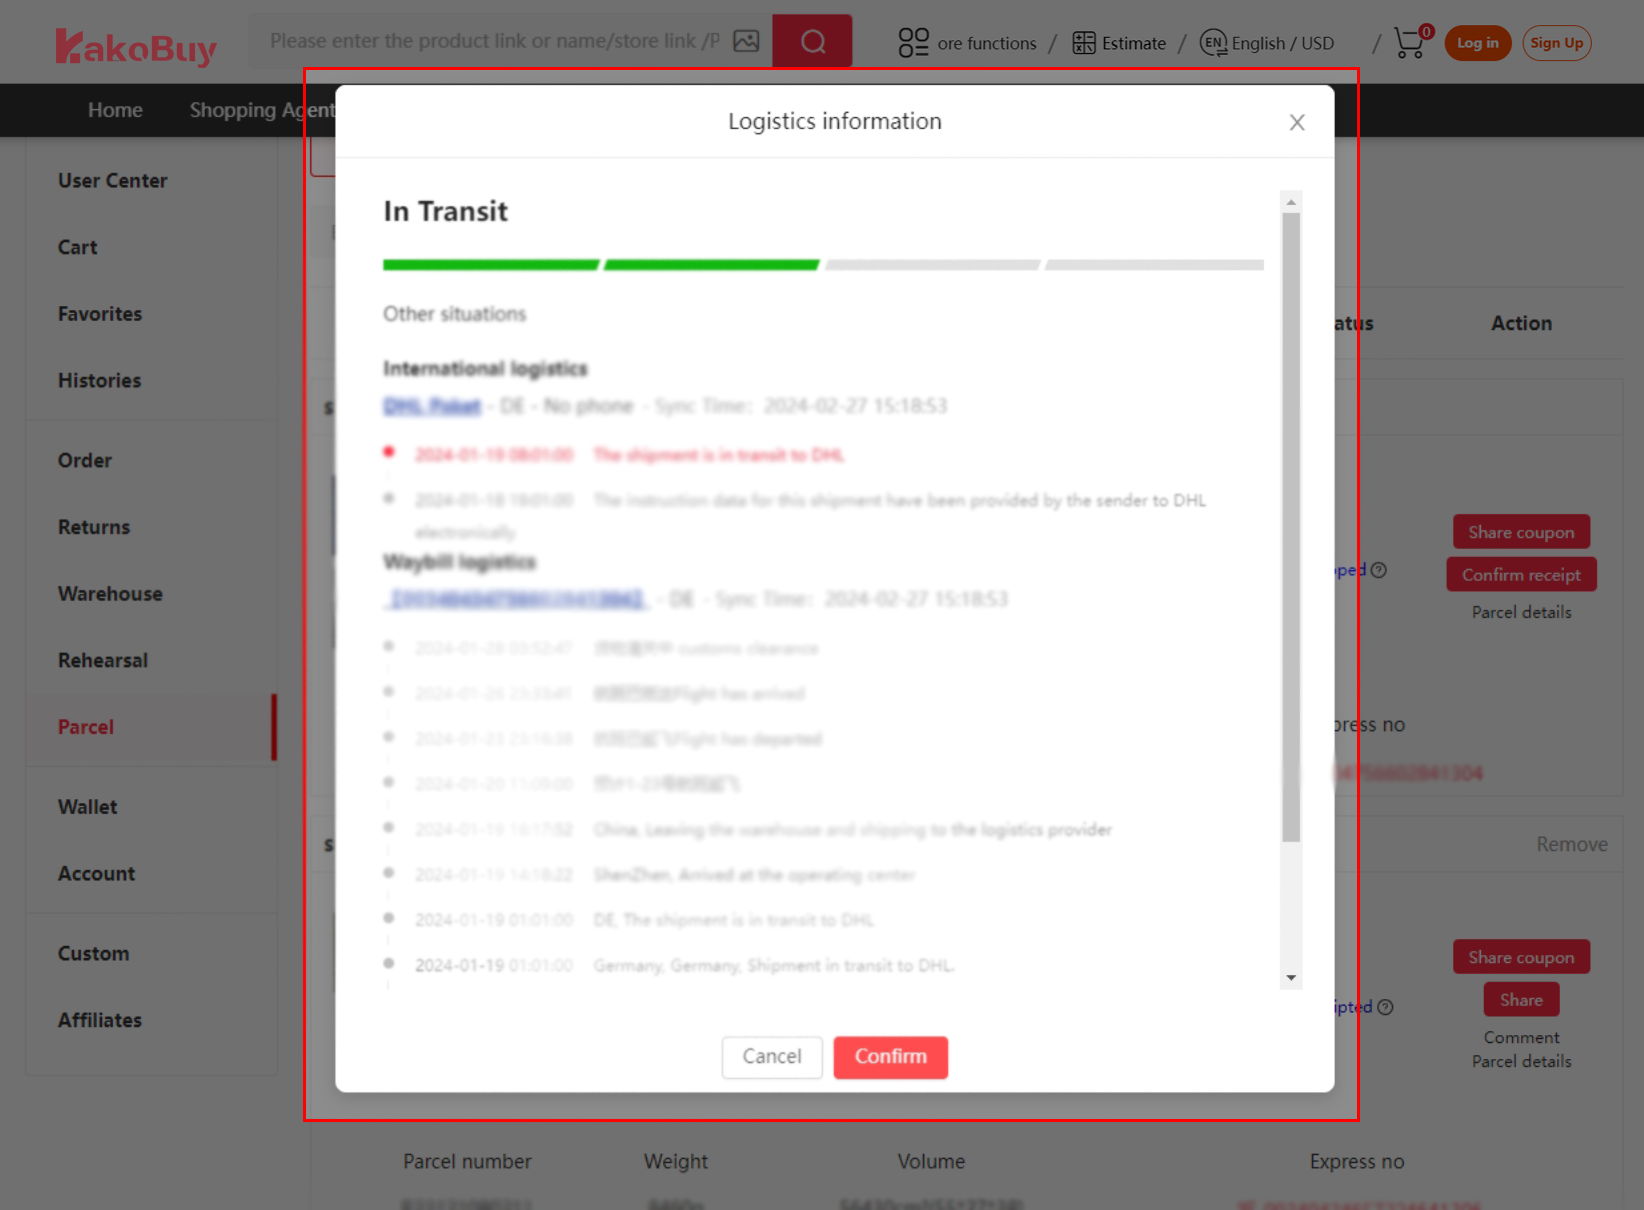
After parcel submission and payment, Kakobuy arranges packing and outbound processing, then hands the parcel to the carrier. Follow the actual parcel status and logistics events in your account.
Different stages may update at different times. A tracking gap can occur between handovers; it does not by itself prove loss or justify a promised delivery date. Keep the route name and latest event when contacting support.
Read actual carrier events and route conditions. Understand the transport stage.
Inspect delivery and confirm receipt
When the parcel arrives, inspect the packaging and contents before confirming receipt. Compare the items with your order and retain clear evidence of any damage or missing contents.
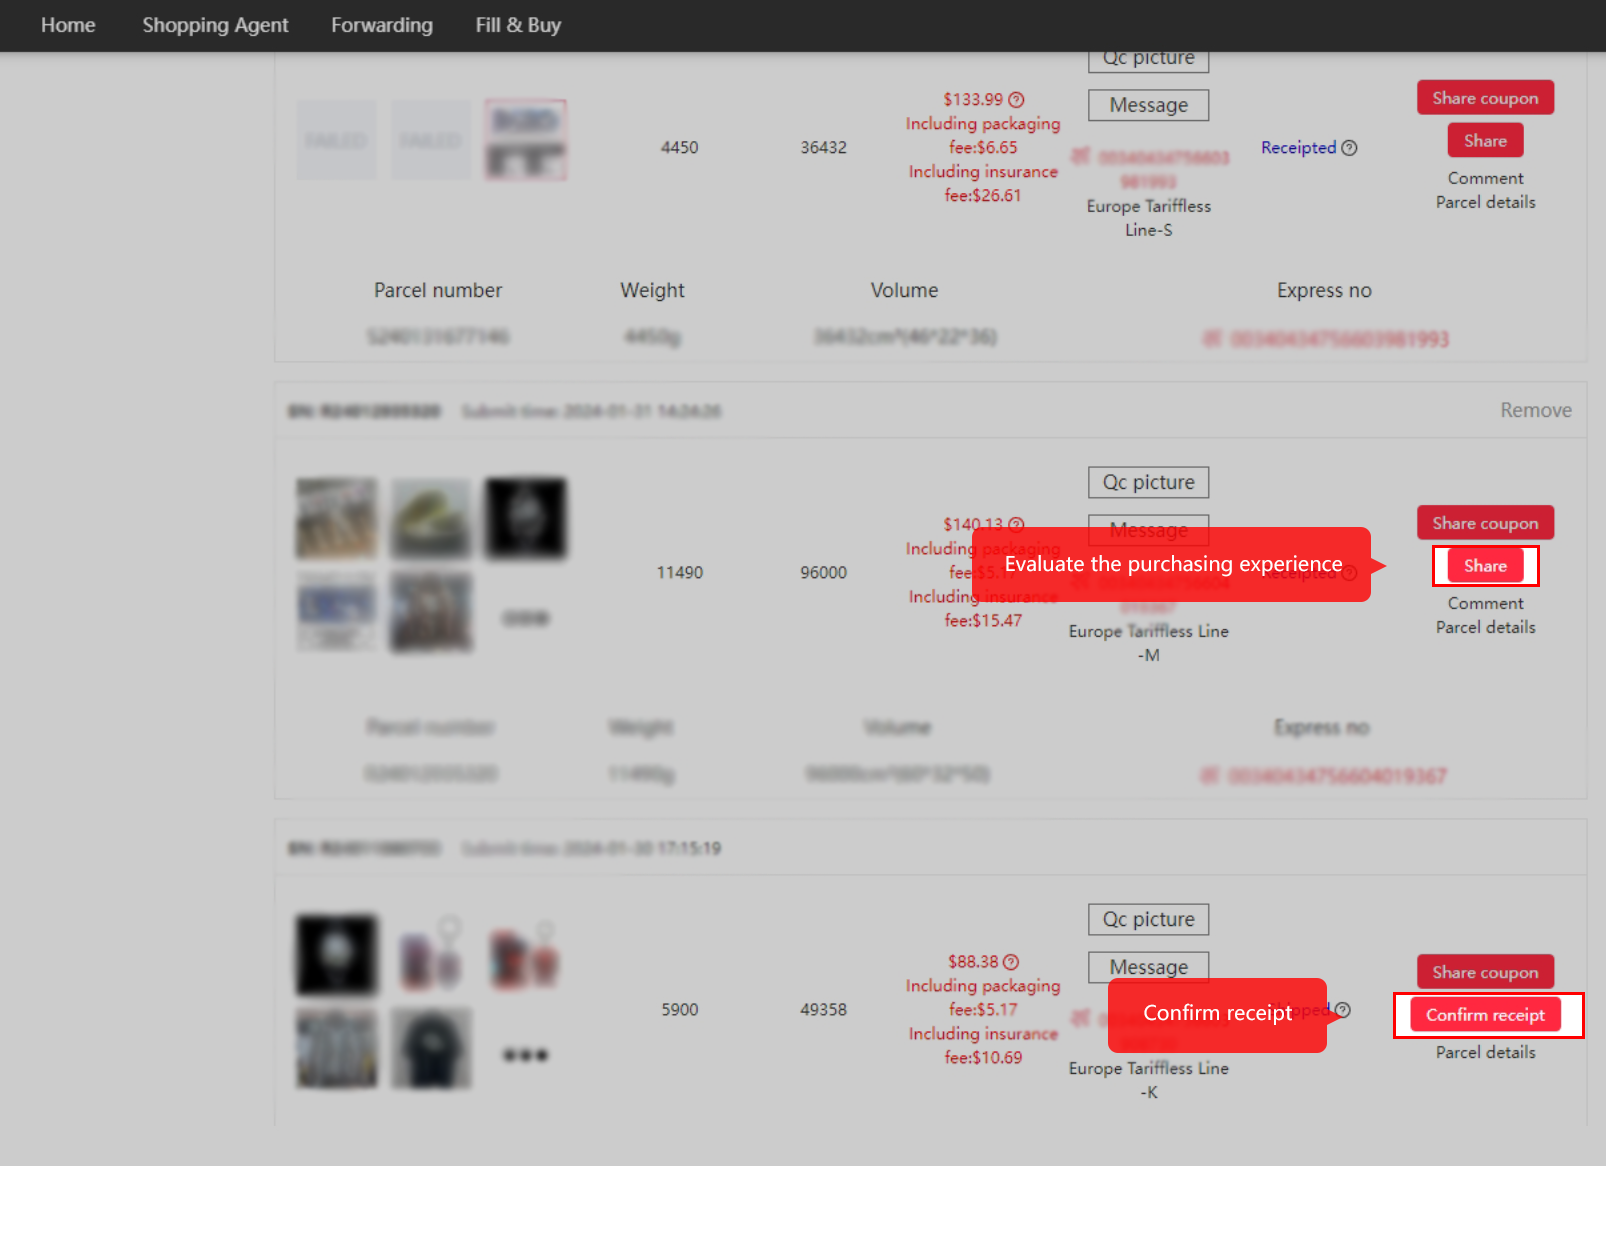
Use the parcel support channel promptly for a genuine delivery problem, with the parcel number and relevant photos. Confirm receipt once you have received and checked the order. A shared review is optional; it should describe your actual experience.
Inspect delivery and preserve evidence. Use the signing checklist before confirming receipt.
Before you start: account and order records
Registration is an account setup step before the buying sequence. The sign-up form may offer an optional invitation field; current account terms and offers govern. Keep goods-payment and international-freight receipts separate, and use the correct order or parcel number when asking for support.
For forwarding goods you purchased yourself, follow the logged-in transit-order instructions and warehouse address. Ordinary agent purchases use a different purchasing workflow.